Our wallpapering guide for photo wallpapers

A photo wallpaper is an absolute attention magnet that gives your home its very own character. Best of all, it can express your personality particularly well, as you have a choice of very individual and emotional motifs.
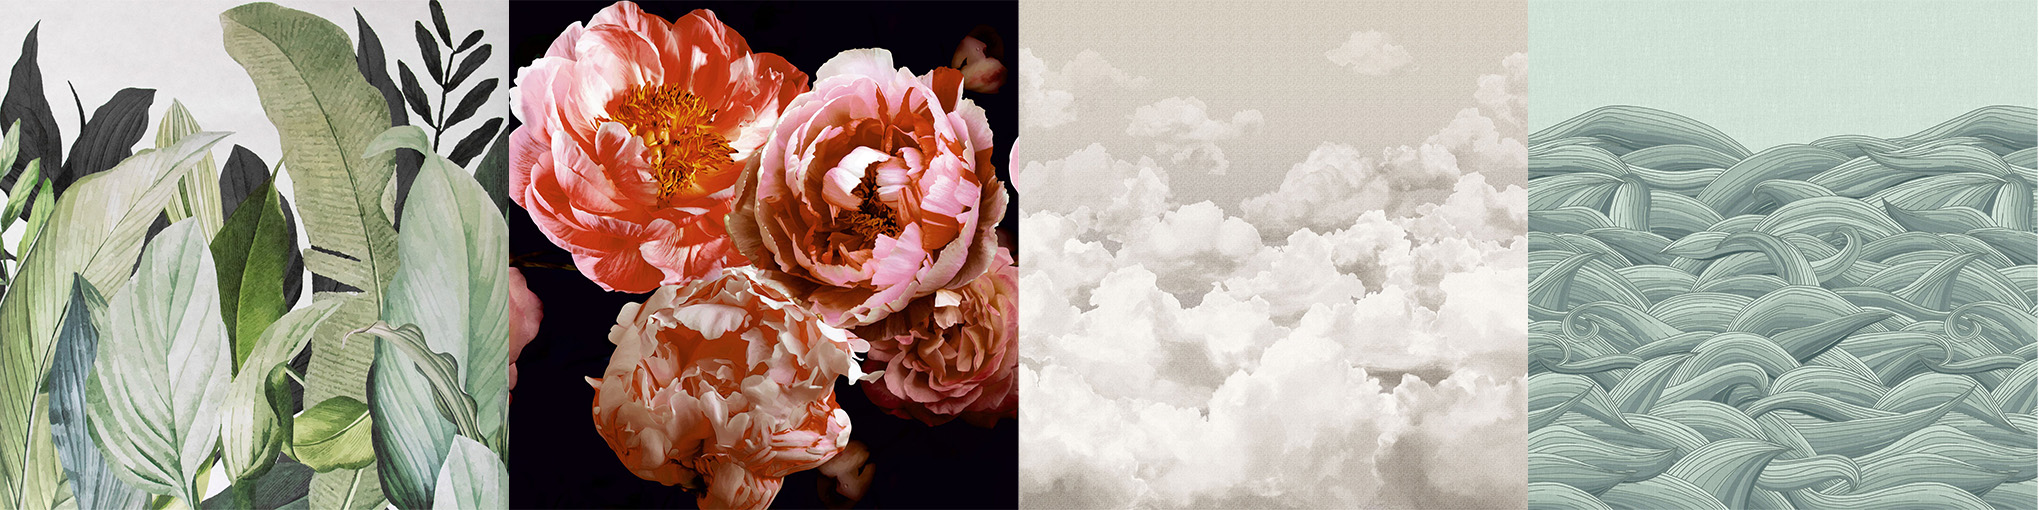
The motif is clearly what makes a photo wallpaper so special: it can be large-format prints of all kinds, such as photographs or paintings and illustrations. This is where it differs from "ordinary" wallpaper: With the latter, the pattern repeats regularly - except, of course, with plain wallpaper.
Another important difference is that a photo wallpaper is basically a fixed size, whereas with other wallpapers you are free to decide how much wall space you want to cover. At Hohenberger, photo wallpapers are usually 280cm x 270cm - but you can extend them by one or more panels, as the first panel always matches the last one. Of course, you can also trim the edges of your wallpaper if you have less space available.
However, an impressive motif also brings with it a small challenge: when wallpapering, it is particularly important that the strips are glued to fit exactly, as mistakes are noticed quickly. With our instructions, however, you will be able to stick a photo wallpaper to the wall without any mistakes in no time at all.
At Hohenberger, only high-quality non-woven photo wallpapers are produced and sold in the shop; these are particularly uncomplicated to use. They have the great advantage that you do not have to paste the wallpaper strips, but only the wall. This makes it much easier to apply and align the wallpaper correctly on the wall, because the strips can be moved back and forth a little, removed again and minor mistakes can be corrected. It is important to glue the individual panels edge to edge, i.e. not overlapping.
Preparation
- To begin, you should print out our checklist and get all the materials and tools you need beforehand. Once you have everything, have it ready on the day of the renovation.
- The substrate must be light-coloured, solid, dry, absorbent, clean and free of unevenness. If your substrate has one or more defects or if old wallpaper still needs to be removed, we recommend applying our painter's fleece Pro 150 before wallpapering for an optimal result. It is best to read our instructions Do I have to treat my surface? and How do I remove old wallpaper from the wall?
- If you have purchased a Hohenberger photo wallpaper, the area to be wallpapered is about 8 square metres. You should allow about three to four hours for this. That sounds like a lot of time, but it will save you unnecessary stress.
- Especially with a photo wallpaper, a helping hand is highly recommended to align the strips with sensitivity. For this purpose, one person should press on and hold the wallpaper strip at the top, while the second carefully presses the strip down and adjusts it to the edges. With a little skill, however, wallpapering a photo wallpaper can also be done alone.
- To avoid draughts and to prevent the paste from drying too quickly, you should close windows and doors and regulate the room temperature to 18 degrees during warm weather.
- To protect doors, windows, furniture and floors, cover and tape them and remove skirting boards if necessary.
Cutting the wallpaper to size and measuring the wall
- The first step is always to check the article and production numbers (batches) of the wallpaper rolls and to look for any differences in colour and pattern or production errors. this makes sense in order to be able to complain to the manufacturer and, at the same time, you only make more work for yourself if you have to remove a faulty wallpaper and paste it again.
- Cutting the strips to size is particularly easy here: unroll the wallpaper and carefully cut it along the pre-drawn lines using a utility knife and a tear-off ruler or suitable scissors. It works particularly well if you unroll the wallpaper the day before so that it stretches smoothly. After cutting, you should have four strips. Remember the order by numbering the strips on the back.

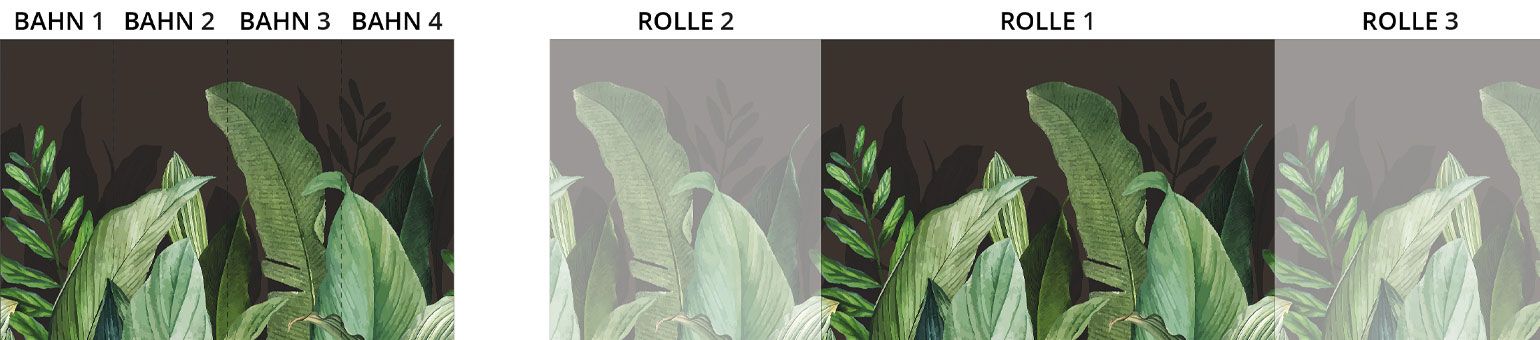
- Hohenberger photo wallpapers can also be applied continuously, because the first strip always matches the last. In this way, you can extend your wallpaper by one or more panels.
- If you want to place the motif in the centre of your wall, you should measure very carefully and make enough marks with a pencil for orientation. First determine the centre of the wall and then mark the area for the panels to the right and left of it. It is important to use a spirit level to mark vertical lines and to get a perfectly aligned motif later.
- If you want to start the wallpaper in a corner of the room, measure the area on the wall that you need to cover with paste for your first strip. Mark it with a pencil.
Pasting and gluing
- We strongly recommend using high-quality paste, preferably our non-woven extra-strong wallpaper paste.
-
Fresh paste residue can be wiped off with a damp sponge on our
water-resistant wallpapers
 It's best to do this as soon as you notice it
- Mix the paste according to the instructions and make sure that it is stirred in thoroughly and allowed to swell sufficiently long. For heavy wallpapers with glass beads, granite and flock, the paste should not be mixed too thinly and any paste residue should be only dabbed off with a damp cloth, not wiped off.
- Measure the area on the wall that you need to cover with paste for your first strip. To do this, hold the roller against the wall, starting at the left edge and add 10 centimetres to the other side. Make small marks with a pencil.
- Apply the paste to the wall, using a brush for the corners and narrow areas and the paste roller for the large areas. Wipe the paste roll on the scraper grid to pick up the right amount of paste.
- Then stick on your first strip starting at the top, leaving about 5 centimetres of wallpaper protruding at the top and bottom. Press the wallpaper lightly with your hand at first so that you can correct any mistakes. Try to stay as straight as possible when rolling the wallpaper from top to bottom and use a spirit level to align the first strip correctly. If it doesn't fit properly, just carefully pull the wallpaper off again and put it back on.
- Once the wallpaper is correctly aligned, you can press it firmly into place. It is best to use a soft foam rubber roller to press the wallpaper down and never a wallpaper spatula. Try not to create any air bubbles when rolling. If air bubbles do form, you can press them out to the side with a wallpaper brush or the pressure roller. You can finish the butt edge with a seam roller and smooth out any unevenness.
- When everything is to your satisfaction, place the tear-off ruler at the top and bottom of the strip and cut the wallpaper straight along the ruler with a utility knife.
- Then paste the wall for your second strip.
- First lay the second strip loosely, again leaving 5 centimetres overhanging at the top, and then align it so that the patterns match exactly. Then do everything as you did with the first strip.
- If any corners of the wallpaper become loose, simply apply paste again with the brush and press the wallpaper down with the pressure roller.
- When you have applied your last strip and still have an overhang on the right or left edge, you can again place the tear-off ruler in the right place and cut the wallpaper step-by-step along the desired edge with the utility knife.
Power sockets and other cut-outs
- Before wallpapering, you should remove light switch covers and socket covers. It is important to turn off the power beforehand and to use an insulated screwdriver.
- When wallpapering, first stick the wallpaper loosely over the recess. Then cut it out with a utility knife and press the wallpaper into place.
- After sufficient drying time, you can reattach the covers of the sockets and light switches.
Done! Proud of yourself? You have every right to be! We hope you enjoy looking at your work every day.
We would be very happy if you shared the finished wallpapering result with us on Instagram!
Feel free to post with #hohenberger or use the tag @hohenberger_wallcoverings and we will repost your picture on our channel.
Looking for the next challenge?
Then check out our instructions for wallpapering a non-woven wallpaper.
